
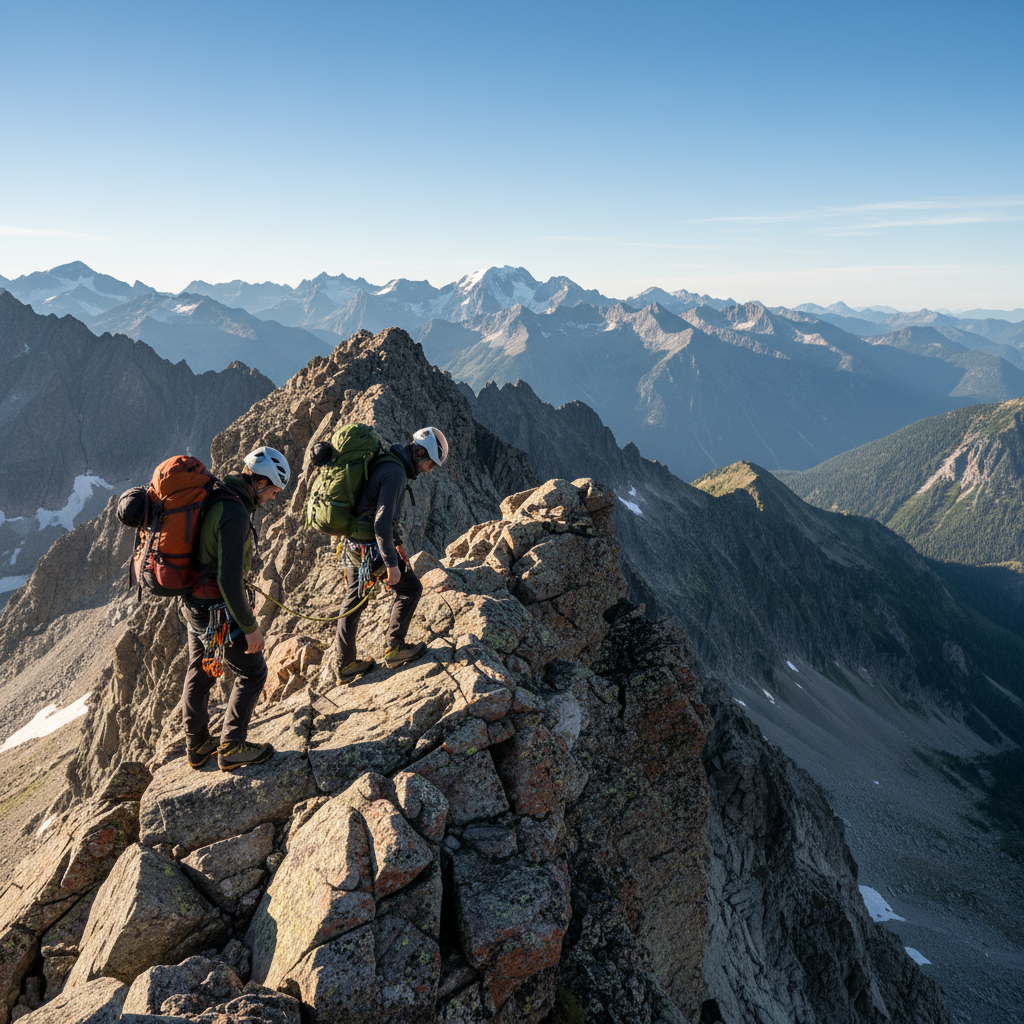
difficult hiking trails advanced hikers choose are rarely “hard” for just one reason, it’s usually a mix of steep grade, exposure, navigation, weather, altitude, and how far you are from help. If you’ve ever started a route that looked fine on a map, then spent hours managing loose rock, route-finding, and time pressure, you already know the gap between “challenging” and “serious.”
This topic matters because the consequences scale fast, a minor mistake on a mellow trail becomes a real incident on a ridge with exposure or a remote canyon with no cell service. The goal here is not to hype danger, it’s to help you choose routes that match your current fitness and technical comfort, and to prep in a way that keeps the day fun.
A common misconception is that “difficult” just means lots of miles or lots of elevation gain. In practice, a short route with scrambling, tricky terrain, or tricky descent can feel more demanding than a long steady climb. I’ll break down what actually drives difficulty, how to self-assess quickly, then how to plan and execute with fewer surprises.
What makes a trail “difficult” for advanced hikers
Difficult routes tend to stack multiple stressors, your legs get tired, your attention drops, and that’s when navigation and foot placement start to slip. Here are the drivers that most often turn an “advanced” hike into a big day.
- Steepness and sustained climbing: long sections above a moderate grade, plus steep descents that punish quads and knees late in the day.
- Rugged footing: talus, scree, loose rock, mud, wet roots, or boulder hopping that forces constant micro-decisions.
- Exposure: narrow ridges, airy ledges, or fall consequence terrain, even if it’s “only hiking.”
- Route-finding: faint tread, braided social trails, snow patches that hide the path, or confusing junctions.
- Altitude and weather: thin air, lightning windows above treeline, fast temperature swings, or early-season snow.
- Remoteness: few bailouts, long approaches, limited water, and delayed rescue response.
According to National Park Service, staying on designated routes and planning for changing conditions reduces preventable incidents in backcountry settings. That sounds obvious, but on rough terrain it becomes a real skill, not a slogan.
A quick self-check before you pick a hard route
Before you hunt for difficult hiking trails advanced hikers brag about, do a quick, honest check. You’re not trying to prove anything, you’re trying to match the day to your current capacity.
Readiness checklist (be strict)
- Fitness: you can climb steadily for 60–90 minutes without needing long stops, and recover within a day or two.
- Downhill durability: steep descents don’t wreck your knees or cause frequent toe-banging and blisters.
- Footwork: you’re comfortable on uneven rock and can move slowly without feeling rushed.
- Exposure tolerance: you can stay calm on narrow sections and make deliberate choices.
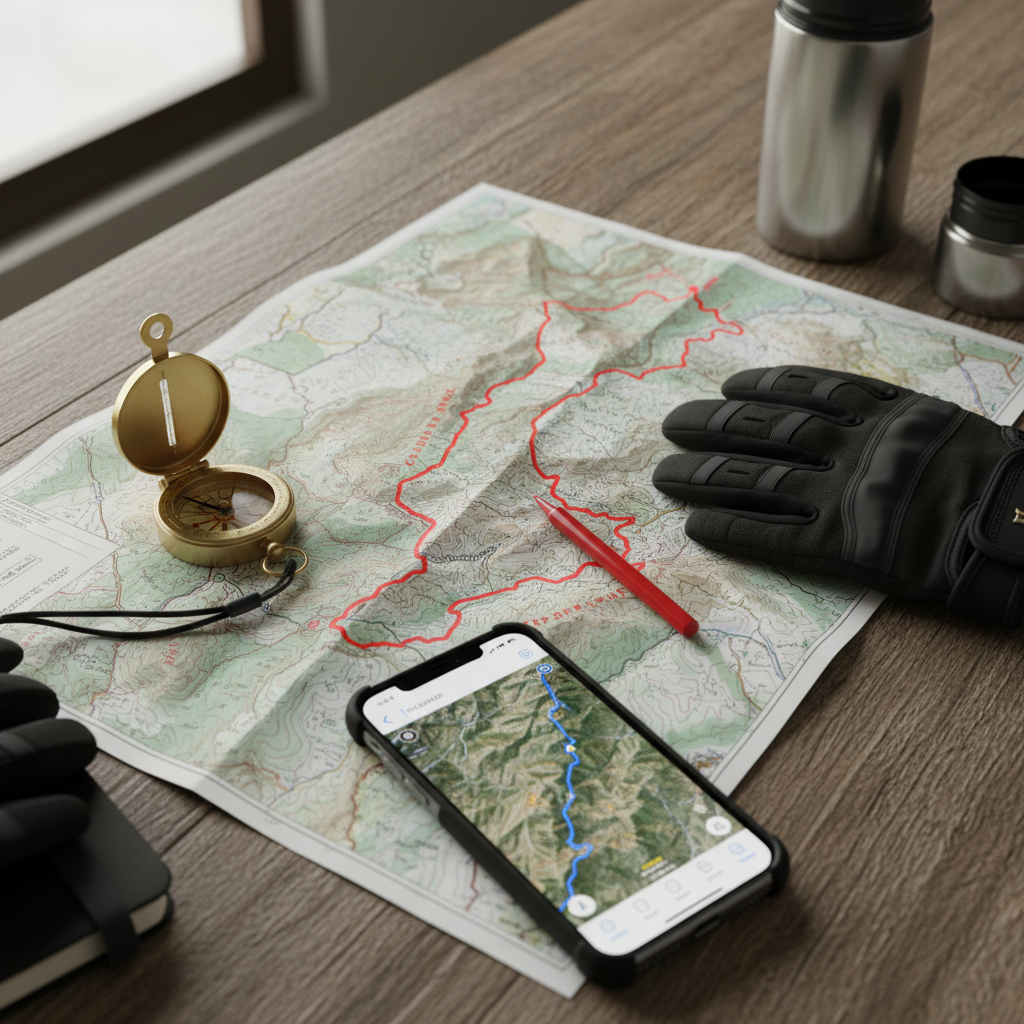
- Navigation: you can follow a GPX track, read topo lines, and identify when you’ve drifted off-route.
- Systems: you bring layers, headlamp, first aid basics, and enough food and water, even on “short” routes.
If two or more items feel shaky, the smarter move is to choose a route with one “hard” feature, not five. Many injuries happen when people stack unfamiliar terrain on top of time pressure.
How to evaluate difficulty without relying on hype
Trail descriptions online can be useful, but they often skew dramatic or vague. For difficult hiking trails advanced hikers can repeat safely, you want objective inputs, then a conservative decision.
Use this simple evaluation stack
- Distance + elevation: look at moving time, not just totals, steep grades slow everyone.
- Terrain notes: search for “talus,” “class 2/3,” “scramble,” “washout,” “route-finding,” “exposure.”
- Descent profile: a brutal downhill after big fatigue is a hidden multiplier.
- Seasonality: early-season snowfields can turn a hike into a traction-and-axe question.
- Bailouts: identify turnarounds, alternate trails, and the last easy exit.
- Water reality: confirmed sources, not “usually flowing,” because dry years happen.
According to NOAA, mountain weather can shift rapidly and forecasts may differ significantly across elevation bands. In plain English, check the point forecast near your high point, then plan for the colder, windier option.
Examples of difficult trail types (and what they demand)
I’m not going to pretend there’s one universal list that fits every state and season. Instead, here are the trail “categories” advanced hikers in the U.S. often mean when they search for hard routes, plus what you should be ready for.
- Big alpine summit days: long climbs, thin air, lightning timing, and relentless descent.
- Scramble-heavy ridges: hand use, exposure management, and route choice matter more than speed.
- Canyon routes: heat, water planning, rock hopping, and sometimes tricky navigation in washes.
- Coastal headlands and slick rock: wind, wet footing, and waves that remove your margin fast.
- Desert mountains: sun load, long water carries, and little shade, even when mileage looks modest.
If you’re selecting difficult hiking trails advanced hikers recommend, match the category to your weak link. If your navigation is strong but exposure feels stressful, choose a rugged route with clear tread, not a ridge with airy moves.
Practical planning: gear, pacing, and a safer margin
Hard days go sideways when the basics get skipped, not when people forget an obscure trick. Build a plan that assumes slower travel, longer breaks, and at least one surprise.
Core tactics that actually help
- Start early: you buy time for route-finding, weather delays, and slower descents.
- Use a turnaround time: pick a hard stop time, not “we’ll see,” and stick to it.
- Fuel before you feel it: steady intake beats a late-day bonk, especially on steep grades.
- Layer for stops: advanced hikers still get cold when they stop on a windy saddle.
- Navigation redundancy: downloaded offline maps, a GPX track, and the ability to interpret the terrain.
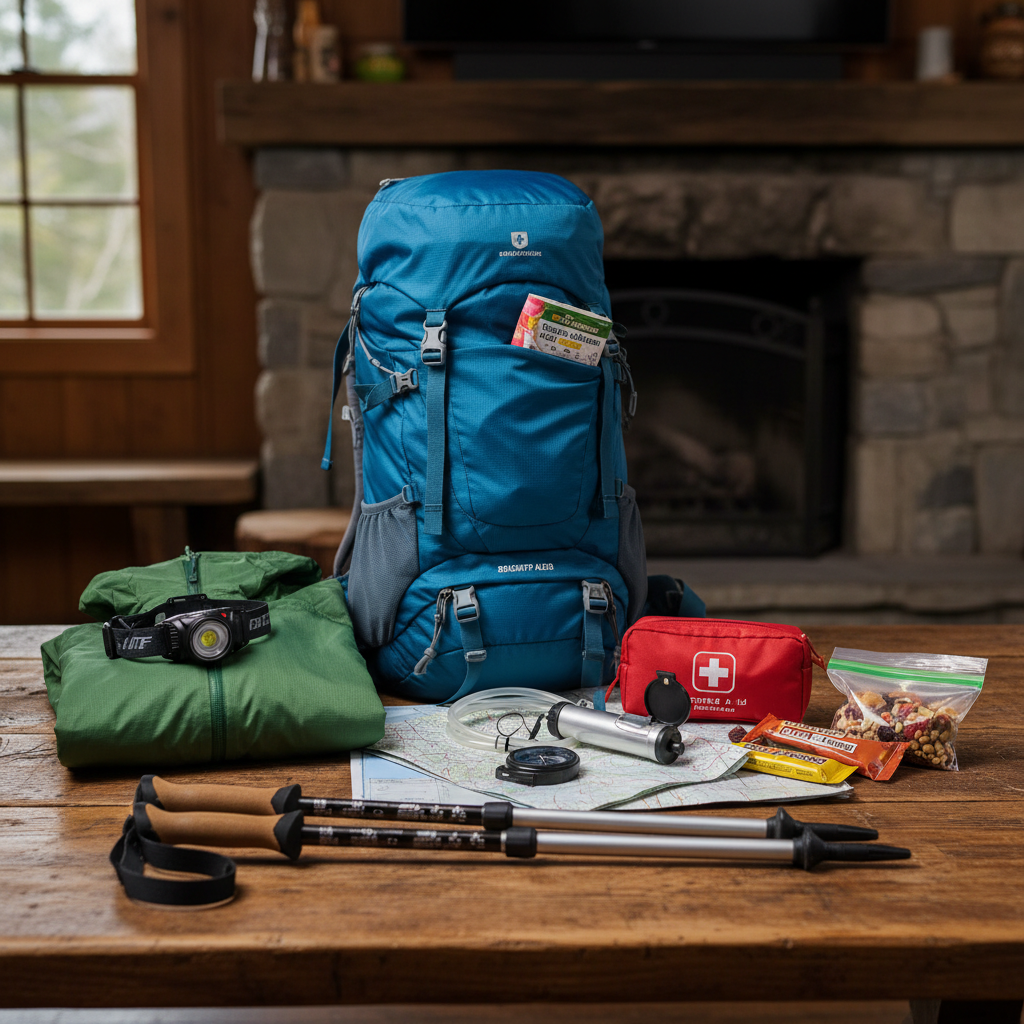
According to American Red Cross, carrying basic first aid supplies and knowing how to use them can make a meaningful difference while waiting for help. On remote trails, “waiting for help” can be longer than people expect.
Common mistakes on advanced routes (that experienced hikers still make)
Even strong hikers get caught by the same patterns, usually because confidence rises faster than conditions improve.
- Underestimating the descent: you feel great at the summit, then lose focus on loose terrain.
- Chasing someone else’s pace: rushing increases slips, especially on talus and wet rock.
- Over-trusting app ratings: “hard” can mean steep, but it might ignore exposure or navigation.
- Not turning around soon enough: sunk-cost thinking is real, and it’s loud.
- Ignoring small warning signs: hot spots, cramps, headache at altitude, mild nausea, these rarely improve by pushing harder.
For health questions like altitude illness risk, it’s reasonable to be conservative and, if you have a history of symptoms or medical conditions, consider asking a clinician who understands mountain travel.
Decision table: pick the right “hard” trail for today
This quick table helps you choose a difficult route that aligns with what you’re actually ready for, not what looks impressive.
| Trail feature you want | Good match if you’re strong at | Plan a safer margin by |
|---|---|---|
| Steep summit grind | Pacing, aerobic fitness | Earlier start, firm turnaround time, extra calories |
| Rugged talus/scree | Footwork, patience | Sturdy footwear, poles, slower descent expectations |
| Exposed ridge | Calm decision-making | Dry weather window, avoid high wind, honest bailout points |
| Route-finding challenge | Navigation skills | Offline maps, GPX track, stop-and-check habit |
| Remote backcountry day | Self-sufficiency | Extra water treatment, emergency layers, trip plan left with someone |
Key takeaway: pick one “primary difficulty,” then keep the rest of the variables friendly, that’s how you build experience without stacking risk.
When to scale back or get expert help
There’s no shame in choosing a different objective, the mountain will still be there. On difficult hiking trails advanced hikers often bring extra skills into play, and sometimes it’s appropriate to formalize that.
- Consider a course or guided outing if you want to progress into scrambling, snow travel, or complex navigation and you feel unsure where the line is.
- Seek local insight when conditions are variable, ranger stations and local trail organizations often know what’s washed out or snow-covered.
- Be cautious with medical red flags like chest pain, severe headache, confusion, fainting, or worsening nausea, stop and seek help, and when in doubt call emergency services.
According to Leave No Trace Center for Outdoor Ethics, planning ahead and preparing is a core principle for reducing impact and avoiding avoidable emergencies, which also tends to make your day less stressful.
Conclusion: make “difficult” feel deliberate, not chaotic
Hard hikes can be deeply satisfying when the difficulty is chosen, not stumbled into. Aim for a route where you understand what makes it tough, you’ve built a margin for weather and pacing, and you’re willing to turn around without arguing with yourself.
If you do one thing this week, pick a challenging trail category that targets your current weak spot, then plan a conservative day around it, that’s how advanced ability grows without burning out or getting hurt.
FAQ
What qualifies as “difficult” vs “moderate” for advanced hikers?
For many people it’s not mileage alone, difficulty shows up when steep grade, rough footing, exposure, or navigation demands require constant attention. A route can be short and still feel advanced if the terrain punishes mistakes.
How do I find difficult hiking trails advanced hikers recommend in my state?
Start with reputable sources like park pages, local trail organizations, and guidebooks, then cross-check recent trip reports for conditions. Look for mentions of route-finding, exposure, and descent quality, not just “epic views.”
Is scrambling still considered hiking, and when do I need a helmet?
Scrambling often sits between hiking and climbing, and definitions vary by region. If the route has loose rock overhead, crowded gullies, or real fall consequence, many hikers choose a helmet, especially in popular scramble corridors.
What’s the biggest planning mistake people make on hard trails?
Under-planning the descent and daylight is a frequent one. People budget time to reach the high point, then discover the way down is slower, looser, and more mentally tiring.
How much water should I carry on a difficult hike?
It depends on heat, exposure, and reliable sources, so there isn’t one number that fits every route. A practical approach is to estimate conservatively, identify confirmed refill points, and carry a filter or treatment so you’re not forced to ration.
Are trekking poles worth it on advanced terrain?
Often yes for steep descents and loose surfaces, they reduce leg fatigue and can add stability. On exposed scrambling, you may want poles that stow quickly so your hands stay free.
What’s a smart way to train for difficult hiking trails advanced routes?
Build uphill engine and downhill durability, then add specificity: stairs or steep hill repeats, loaded pack hikes, and practice on rocky terrain. If altitude is part of the challenge, consider gradual exposure rather than a sudden jump.
If you’re planning a tougher route and want a more confidence-building approach, a local guide service or skills course can be a practical shortcut, you get current conditions, better pacing habits, and feedback you can reuse on future objectives.